How good is IrfanView!?

For those not in the know, IrfranView is a massively lightweight and powerful image viewer / manipulation program that has been around for decades. I first used it in the early 2000’s on Windows XP. It does only natively support Windows but can be ran on Linux and MacOS under Wine. It’s such a fantastic tool that I keep going back to it. It has an installer or a zip package making it handy to keep on a USB key or for systems where you can’t install software. It’s so lightweight and fast that it is a joy to use, especially when compared to the bloated modern software that we have to put up with nowadays.

My absolute favourite feature of IrfanView is the batch image processor. It has many options making it super easy to convert batches of images. Any time I’m doing documentation, I pull out IrfanView to resize my in-line images to be small and web friendly before I upload them. The batch processing window, with the keyboard shortcut of the letter ‘b’ (love it), just opens up instantly and shows its magnificence. The simplicity of the file browser, image manipulation options and output configuration in the same window is brilliant and it makes it so user friendly to use.

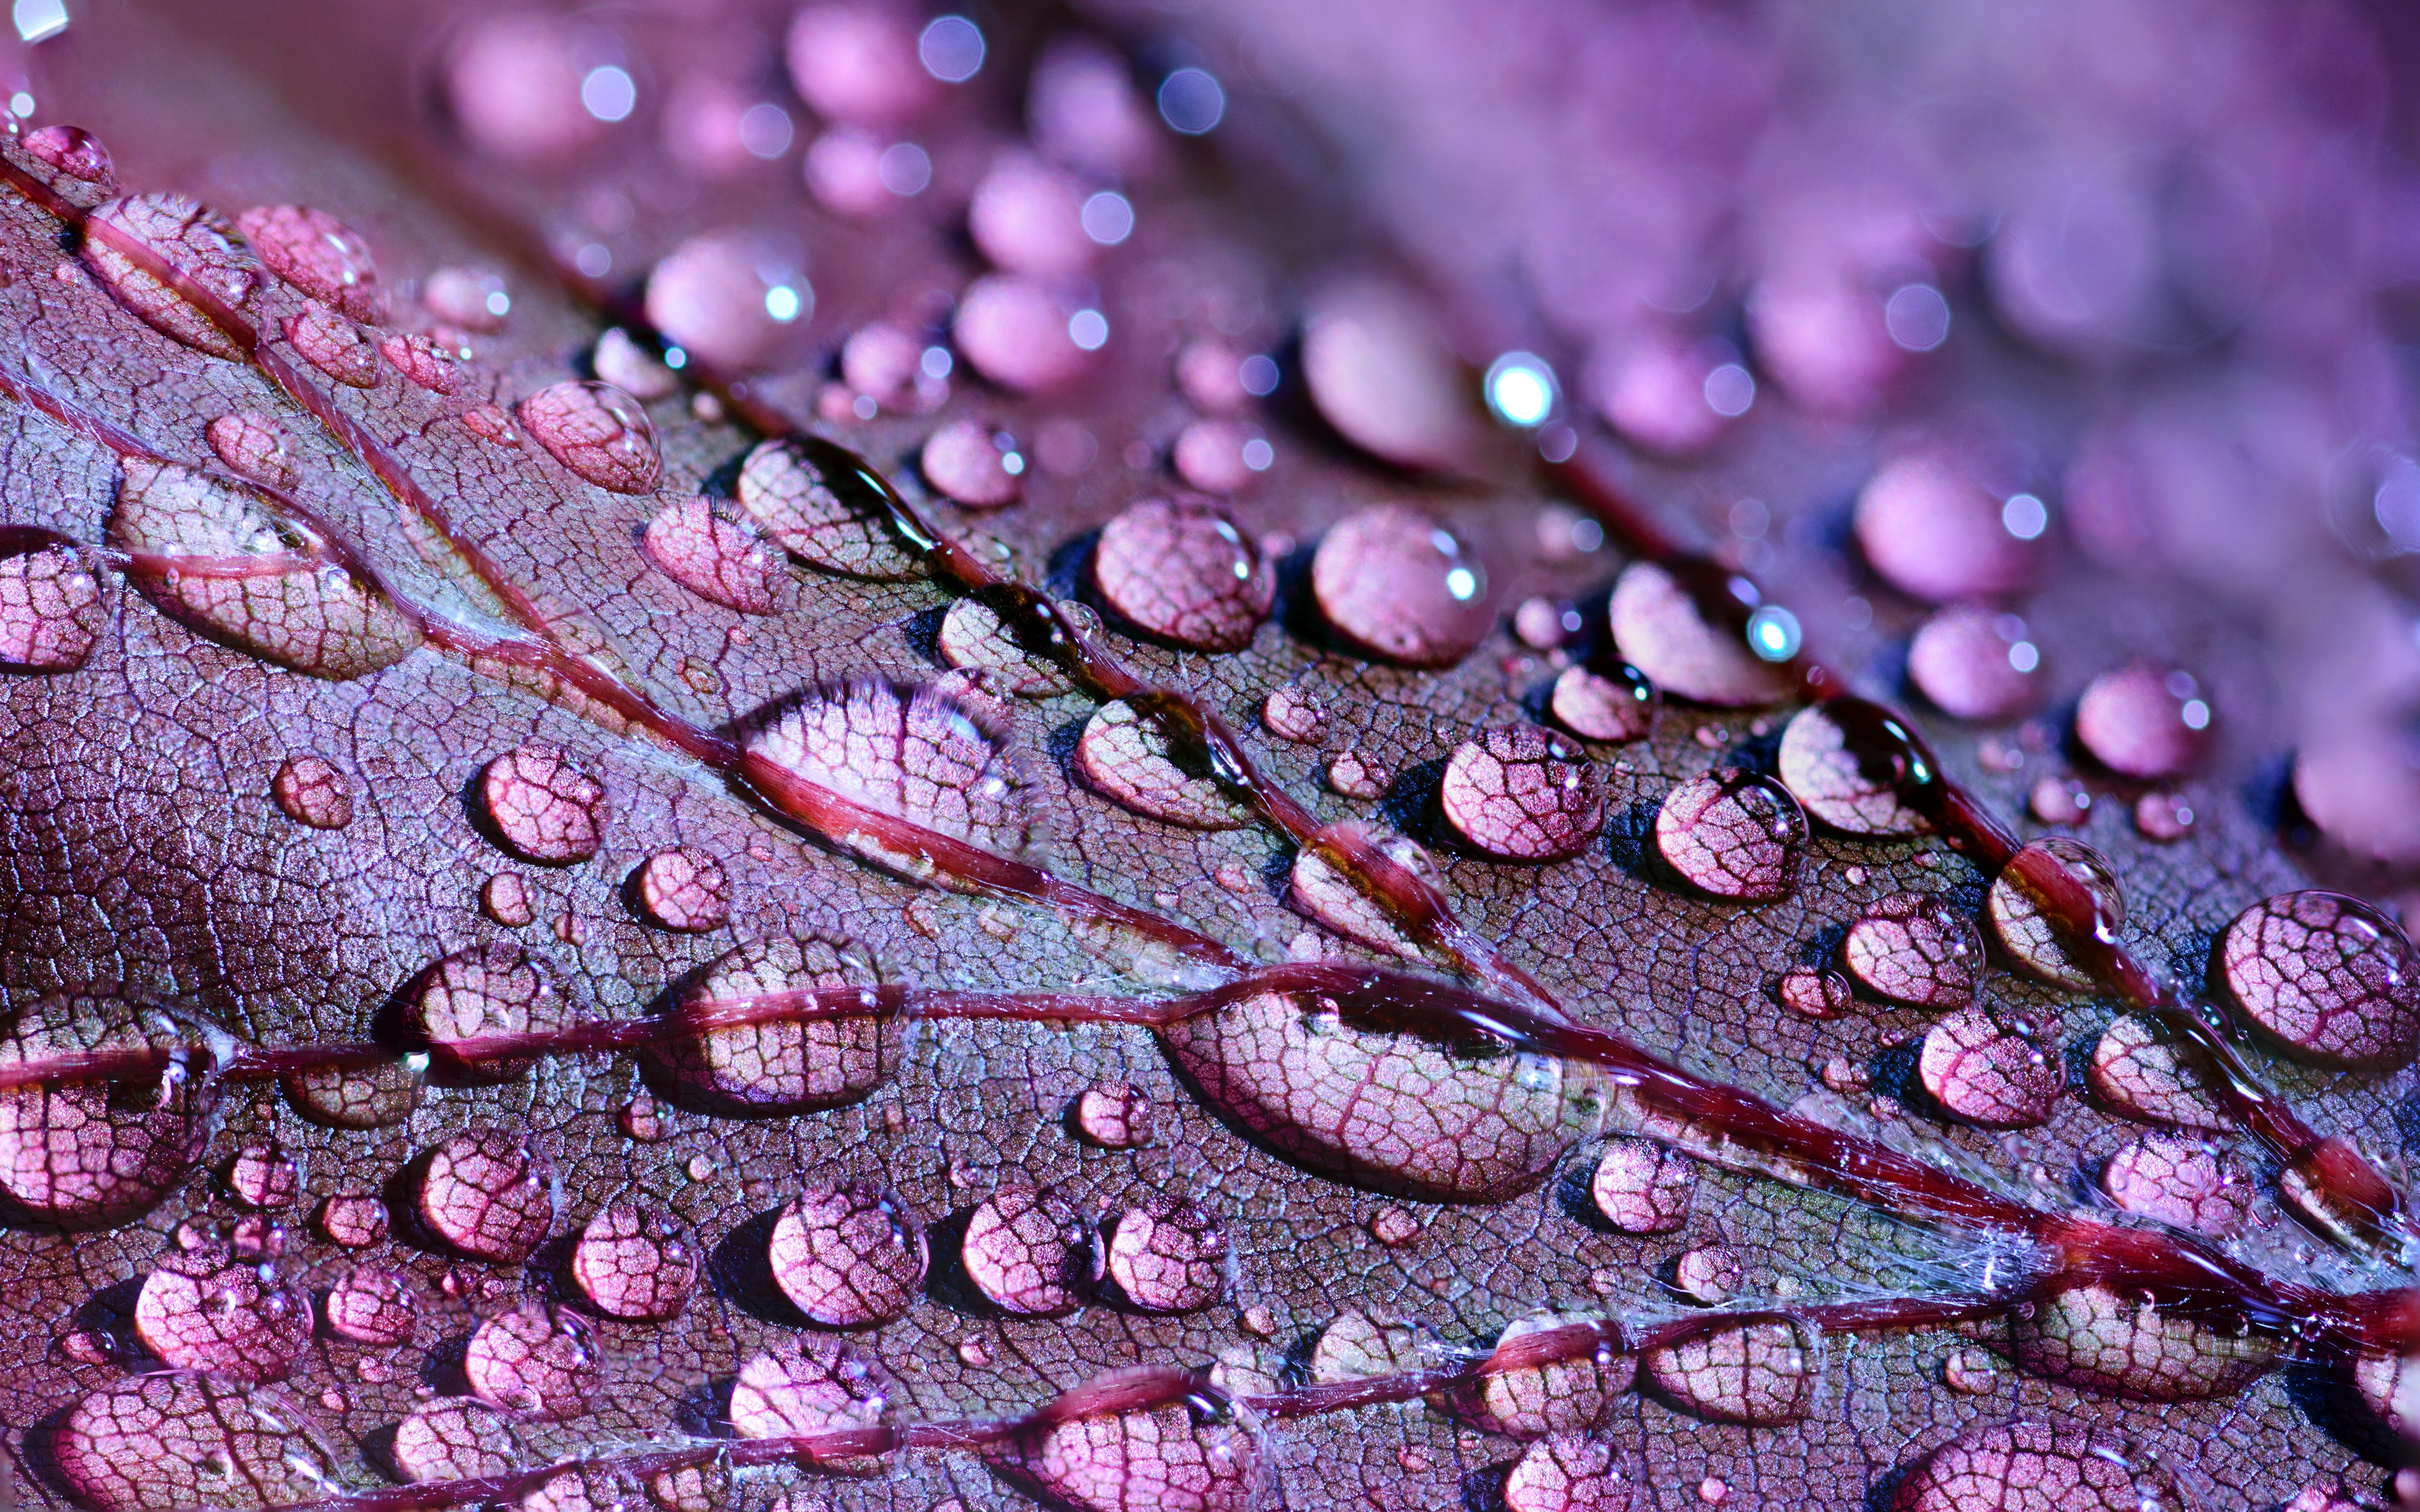
To demonstrate how flexible and feature rich IfranView is, I took some creative-commons free to use images and adjusted the quality, resized then renamed them. For this demo, I am using a purple image with water droplets on a leaf to show the before and after. Here is the image in its original form with the following properties:

To get into the batch processing mode, open IrfanView and press the ‘b’ key which will open the window below. The first thing to do is select if you are converting, renaming or doing both. For me, it is usually Batch conversion – rename result files. After that is selected, use the file browser on the right hand side to find the folder containing your images.

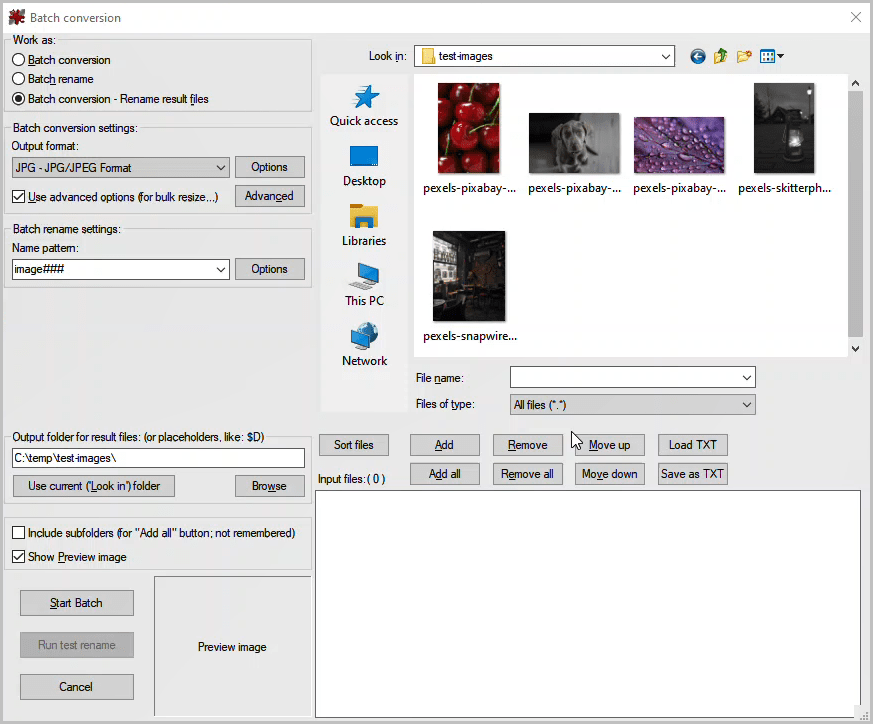
Once the images are selected, click add to add them to the input files window. Next we will go through the output and rename settings.

In this example we are using JPG, but you could output to 22 other image formats including common formats like BMP, GIF, PDF, PNG, RAW and TIF. For each out put type, there are unique compression, encoding and colour settings dependent on the standard. Some output types like RAW need a plugin to be installed before you can use them. To demonstrate compressing the images, from the options window I set the file size to 1MB. This greys out the quality slider since you are compressing to a fixed file size.

Under advanced, you can choose from many different options including cropping, resizing, colour depth, rotation, brightness, contrast etc. The options are extensive and you can easily make complicated adjustments to your resulting image files. For this test I have chosen just to reduce the size by 50% of its original width and height and leave everything else default.

When you go into the batch rename settings, you can specify a name and number pattern as well as an increment and start point for your number, as well as some other advanced options.

Once you are happy with the settings you have chosen, from the main window select ‘Start Batch’ and the processing will begin.

Here is our test image 50% of its original size, compressed to 1MB with the following properties:

As you can see, IrfanView is extremely flexible and makes batch image processing fun!

You could also achieve the same with ImageMagick’s convert command, eg.

convert pexels-pixabay-459301.jpg -resize 50% -define jpeg:extent=1M image120.jpg

But that’s a blog for another day!

Thanks for reading – Jesse

Get Windows 10 Version Information

This morning I needed to quickly get Windows 10 version information for all workstations in a domain, so I wrote the below PowerShell script. This basic script only needed a few things to get the job done; a way to get all workstations in the domain, a way to only check computers that are online at the time, so the script doesn’t take too long with all the failures generated by offline systems, and the registry keys to determine the current OS build and minor version.

Import-Module -Name ActiveDirectory

$all_computers = Get-ADComputer -Filter * -SearchBase 'OU=computers,DC=somedomain,DC=com' | Select-Object -Property Name

$ExportPath = "$env:TEMP\$(Get-date -Format 'yyyyMMddhhmmss')_workstation_os_build_report.csv"

foreach ($c in $all_computers.name)

{

    if (Test-Connection -ComputerName $c -count 1 -Quiet ) {

    Write-Host "Processing $c" -ForegroundColor Cyan

    $CurrentBuild = ""
    $UBR = ""
    $OSVersion = ""
    $ComputerSystem = ""
    $props = ""
    $obj = ""

        $CurrentBuild = Invoke-Command -ComputerName $c -ScriptBlock { (Get-ItemProperty 'HKLM:\SOFTWARE\Microsoft\Windows NT\CurrentVersion' –Name CurrentBuild).CurrentBuild } -ErrorAction SilentlyContinue
        $UBR = Invoke-Command -ComputerName $c -ScriptBlock { (Get-ItemProperty 'HKLM:\SOFTWARE\Microsoft\Windows NT\CurrentVersion' –Name UBR).UBR } -ErrorAction SilentlyContinue
        $OSVersion = $CurrentBuild + "." + $UBR
        $ComputerSystem = Get-WmiObject -ComputerName $c -Class Win32_ComputerSystem -ErrorAction SilentlyContinue

       $props = [ordered]@{ 
        'HostName' = $ComputerSystem.Name;
        'OSVerion' = $OSVersion
        }
        $obj = New-Object -TypeName PSObject -Property $props

    Write-Output $obj | Export-Csv -Path $ExportPath -NoTypeInformation -Append -NoClobber -Force
    }
    else {
        Write-Host "$c is offline..." -ForegroundColor Green
    }

}
Write-Host "Output csv file is located here: `n `n $ExportPath `n" -ForegroundColor Yellow

Obviously there are a few issues with this script. It won’t get systems that are turned off, PowerShell remoting needs to be enabled/working, and in a large domain, it’s probably going to take a long time without some sort of parallelisation or a more efficient way of querying each host…. regardless, this was just a quick indicator for me of the general patch levels of systems in the domain.

Code also on my github here.

Thanks for reading – Jesse

Export Exchange Online mailbox and archive stats to CSV

If you’re like me, you’ve written variations of this script a hundred times. I decided to finally blog it and put it on git so that I could refer back. This script will get all exchange online mailboxes, check if an archive exists then dump all relevant information to CSV. It helps to know the quota of a mailbox and archive (dependent on your 365 license type), as well as the current usage, item count and if auto expanding archive is enabled. The script will report progress to the console as it goes letting you know what mailbox it’s currently processing and how many are left to process. Enjoy.

# Establish output path
$OutputPath = "$env:TEMP\$(Get-date -Format 'yyyyMMddhhmmss')_mailbox_report.csv"

# Establish result array variable
$Result=@()

# Get all mailboxes
$mailboxes = Get-Mailbox -ResultSize Unlimited

# Get total mailboxes and establish counter variable
$totalmbx = $mailboxes.Count
$i = 0 

# Loop through each mailbox and perform actions
$mailboxes | ForEach-Object {
    # Increment counter
    $i++
    # Add current mailbox to $mbx variable
    $mbx = $_
    # Reset variables for next loop
    $mba = $null
    $mbs = $null
    $mbasize = $null
    $mbssize = $null
    $MailboxAllocationInGB = $null
    $ArchiveAllocationInGB = $null
    
    # Write progress to host
    Write-Host "Processing $mbx" "$i out of $totalmbx completed"
    
    # Check if archive enabled, if so, get archive stats
    if ($mbx.ArchiveName){
        $mba = Get-MailboxStatistics -Archive $mbx.UserPrincipalName
        
        # Format archive size to GB with 2 decimal places
        if ($mba.TotalItemSize -ne $null){
            $mbasize = [math]::Round(($mba.TotalItemSize.ToString().Split('(')[1].Split(' ')[0].Replace(',','')/1GB),2)
            }
            else{
            $mbasize = 0 
        } 
    }

    # Get mailbox stats
    $mbs = Get-MailboxStatistics $mbx.UserPrincipalName
        
        # Format mailbox size to GB with 2 decimal places
        if ($mbs.TotalItemSize -ne $null){
            $mbssize = [math]::Round(($mbs.TotalItemSize.ToString().Split('(')[1].Split(' ')[0].Replace(',','')/1GB),2)
            }
            else{
            $mbssize = 0 
        } 

    # Get archive allocation (quota) and trim everything but the size in GB
    if ($mbx.ArchiveName){
        $ArchiveAllocationInGB = $mbx.ArchiveQuota.Split('G')
        $ArchiveAllocationInGB = $ArchiveAllocationInGB[0]
    }
    # Get mailbox allocation (quota) and trim everything but the size in GB
    $MailboxAllocationInGB = $mbx.ProhibitSendReceiveQuota.Split('G')
    $MailboxAllocationInGB = $MailboxAllocationInGB[0]

    # Create PSObject and store all relevant information for export
    $Result += New-Object -TypeName PSObject -Property $([ordered]@{ 
        UserName = $mbx.DisplayName
        UserPrincipalName = $mbx.UserPrincipalName
        MailboxType = $mbx.RecipientTypeDetails
        MailboxAllocationInGB = $MailboxAllocationInGB
        MailboxSizeInGB = $mbssize
        MailboxItemCount = if ($mbs.ItemCount) {$mbs.ItemCount} Else { $null}
        ArchiveEnabled = if ($mbx.ArchiveName) {"Enabled"} Else { "Disabled"}
        ArchiveName = $mbx.ArchiveName
        ArchiveAllocationInGB = if ($mbx.ArchiveName) {$ArchiveAllocationInGB} Else { $null} 
        ArchiveSizeInGB = $mbasize
        ArchiveItemCount = if ($mba.ItemCount) {$mba.ItemCount} Else { $null}
        AutoExpandingArchiveEnabled = $mbx.AutoExpandingArchiveEnabled
    })
}
# Export results to CSV
$Result | Export-CSV $OutputPath -NoTypeInformation -Encoding UTF8
Write-Host "Output csv file is located here: `n `n $OutputPath `n" -ForegroundColor Yellow

Code also on my github here.

Thanks for reading – Jesse